Why use Docker?
This is a little flow diagram of installing software on your personal computer and I bet at least once for you, this is what has happened.
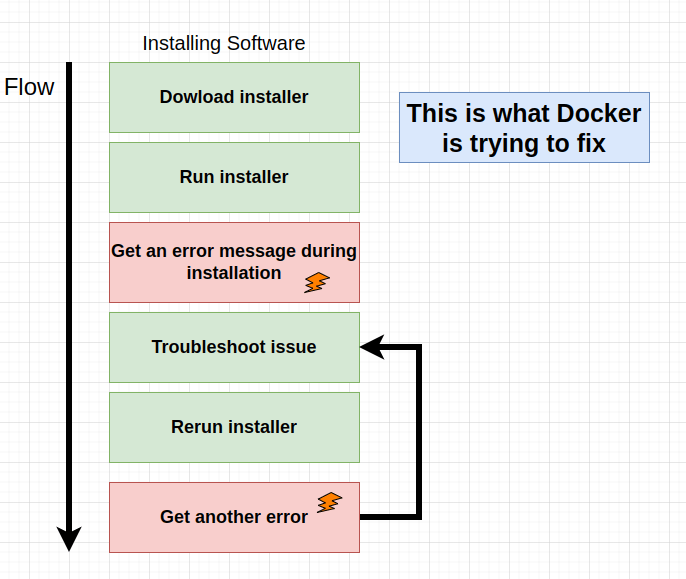
Maybe you have downloaded some installer, you run that installer, and then inevitably at some point in time, you end up getting an error message during installation. You probably troubleshoot the issue by looking at Google. You try to find a solution, you eventually solve that issue. You then rerun the installer and have another error appearing, and then you have to go through this entire troubleshooting process again.
So this is at its core what Docker is trying to fix.
Docker wants to make it really easy and really straightforward for you to install and run software on any given computer. Not just on your computer, not just your personal laptop, or your personal desktop, but on web servers as well or any cloud-based computing platform.
Java Web Application with Spring Framework, Spring Boot and Hibernate.
We have built an application that uses the H2 Database Engine which provides us with a database that will be hosted in memory.
This is a quick solution for testing in the development phases but the problem we found is that every time we restart the server the database is also restarted.
H2 is an in-memory database:
- Does not persist data
- Great for learning
- But not great for production
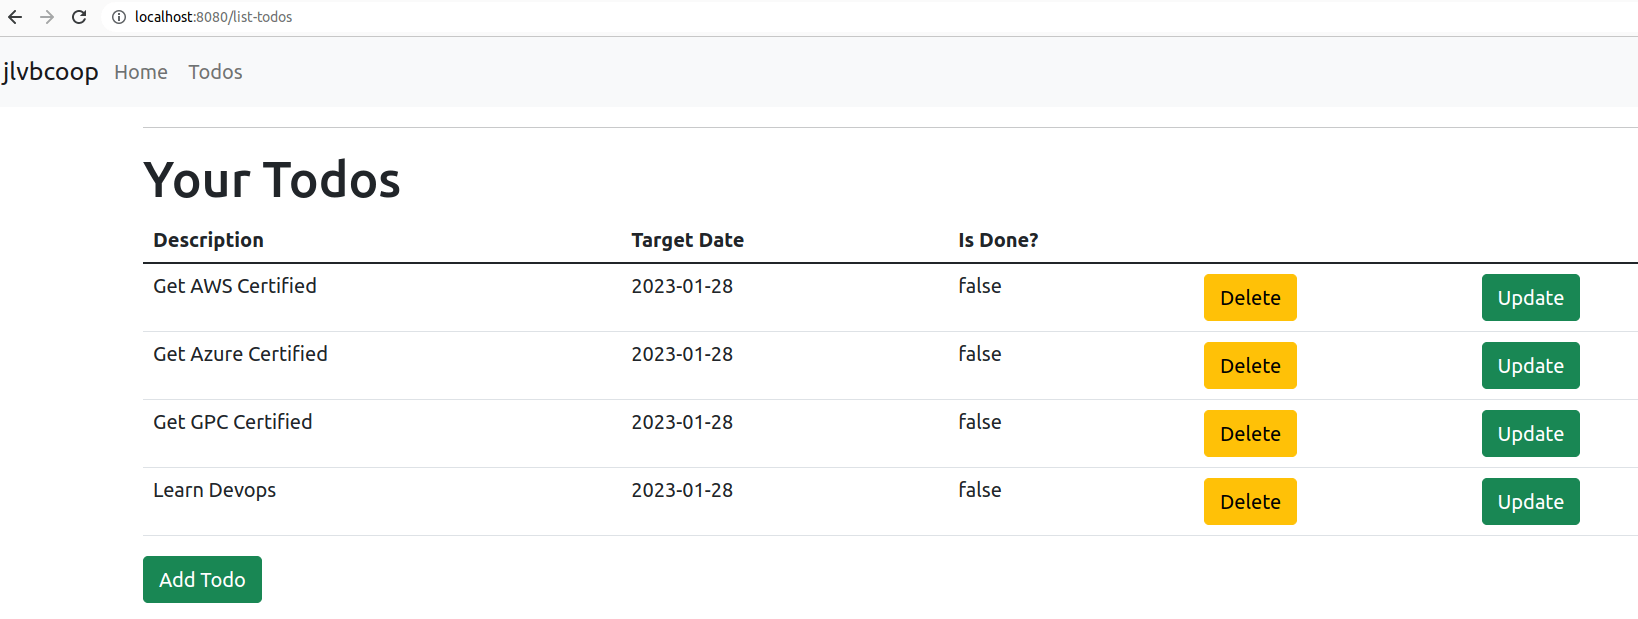
Right now we are not interested in having this behavior in the database, we prefer that every time we restart the server we do not lose the information in the database. We could access the official MySQL pages and follow the entire installation process, but as we have indicated above, Docker exists to make life easier for us. We are going to use Docker to be able to have a database of this type.
From H2 to MySQL using Docker
To carry out this process we only have to take 3 steps.
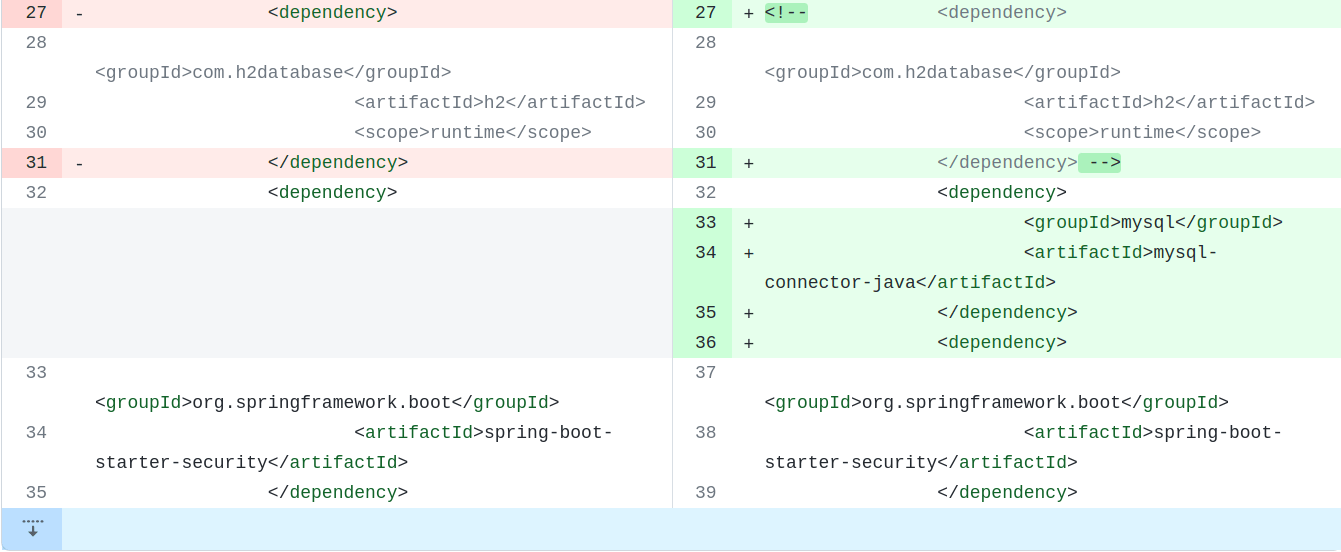
Modify the pom.xml file
We no longer need the H2 dependency, we remove it and declare the MySQL dependency.
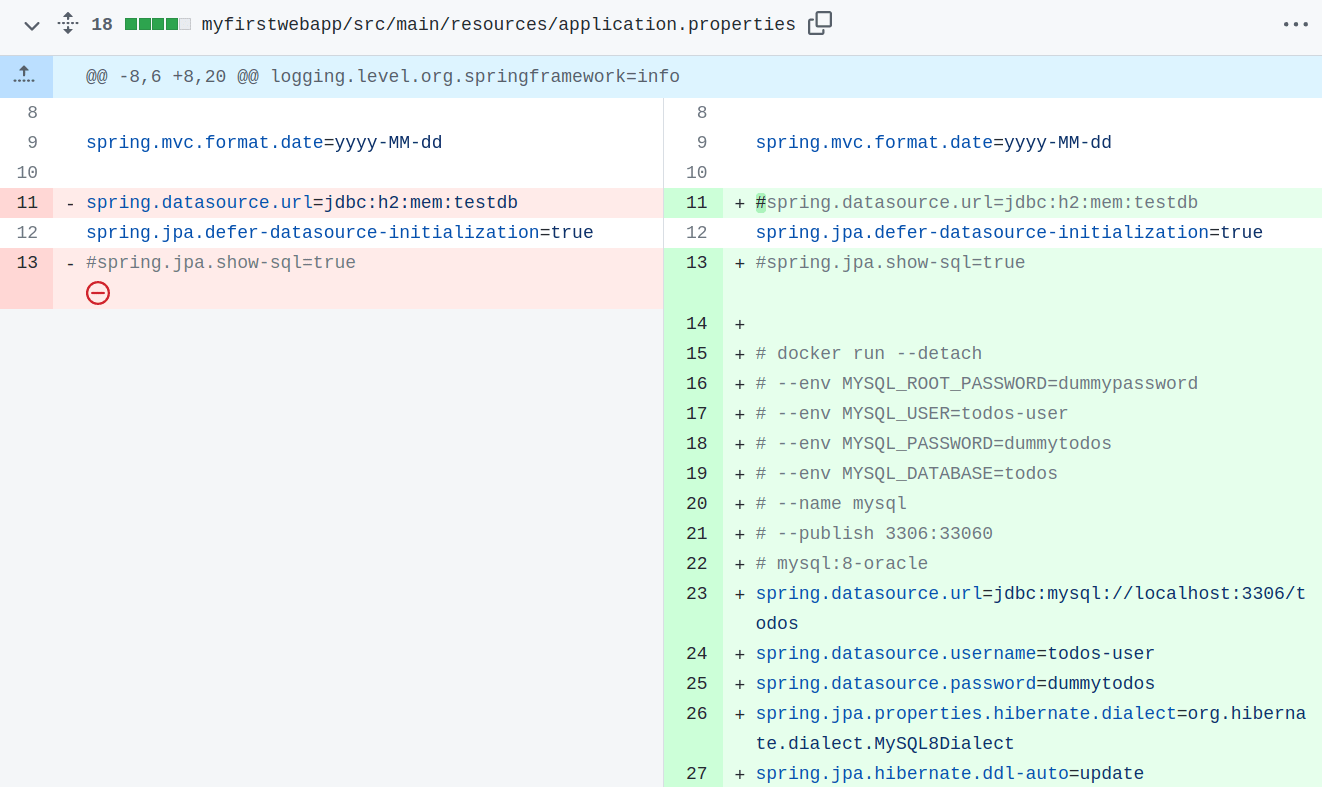
Configuration in application.properties file
In the application.properties file we remove the configuration that activates the H2 database and we create the configuration to use the MYSQL database.
Launch MySQL using Docker
First, we must have Docker installed on our computer and then run the following command. We will be able to start MySQL in a Docker container.
Launch MySQL using Docker
docker run --detach
--env MYSQL_ROOT_PASSWORD=dummypassword --env MYSQL_USER=todos-user
--env MYSQL_PASSWORD=dummytodos
--env MYSQL_DATABASE=todos
--name mysql
--publish 3306:33060
mysql:8-oracle
Identify the container IP address
docker container ls

docker inspect {containerId}
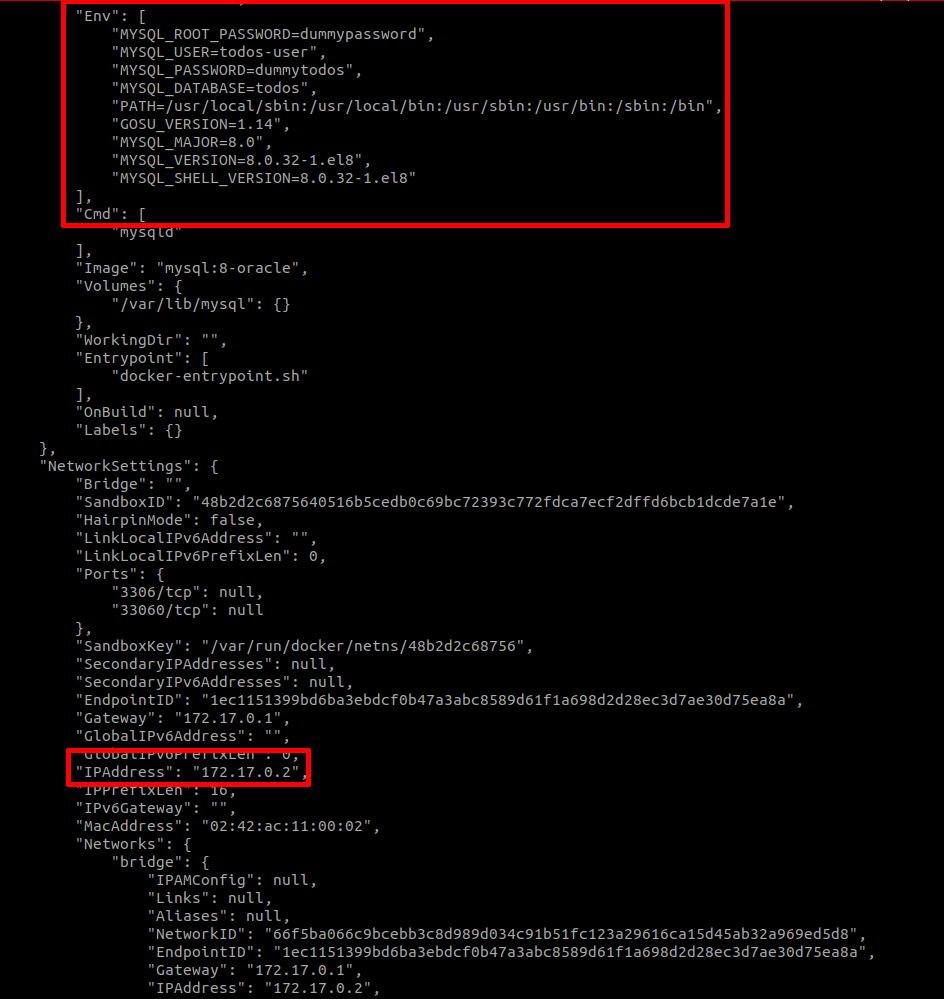
Update application.properties
spring.datasource.url=jdbc:mysql://172.17.0.2:3306/todos
Next, let’s check that the container is installed and working correctly.
Docker commands
docker container ls
docker container stop {IDContainer}
On the other hand, you can install MySQL Shell too. It is an advanced command-line client and code editor for MySQL that will allow you to check the changes made in the database and the connection with it.
MySQL Shell commands
mysqlsh

\connect todos-user@localhost:3306

\sql

use todos

select * from todo;

\quit


Leave a Reply
Want to join the discussion?Feel free to contribute!