Add in HTTPS
See cert-manager.io. In any case, DigitalOcean offers a free certificate, enabling and using it is not difficult.
We will only do it in the production environment, it is not necessary for the development environment.

My free trial with Google Cloud has ended but we can continue with the DigitalOcean free trial.
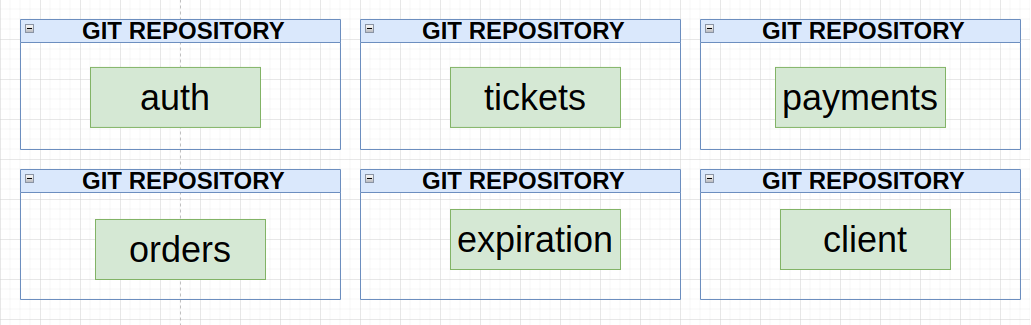
We are going to continue working on the project that we have talked about in this post (Next.js + Kubernetes). Now, let’s imagine that we will have several teams working on our project.
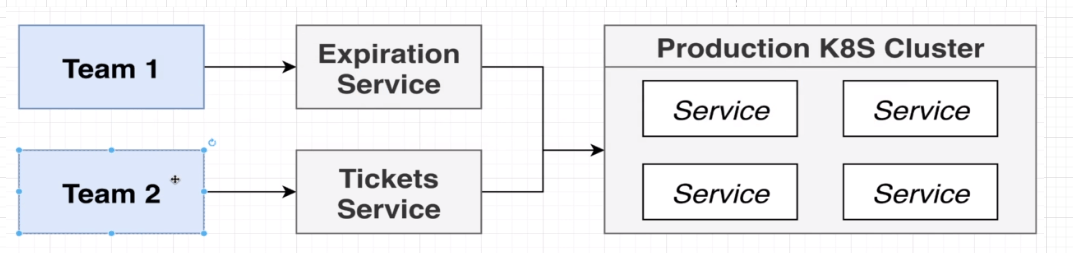
Every time they make some changes to the services, we should expect that those changes will be deployed into some production Kubernetes cluster.
This is a little diagram or a workflow that many engineers used in many projects and it is the workflow that we are going to follow to achieve what we want.
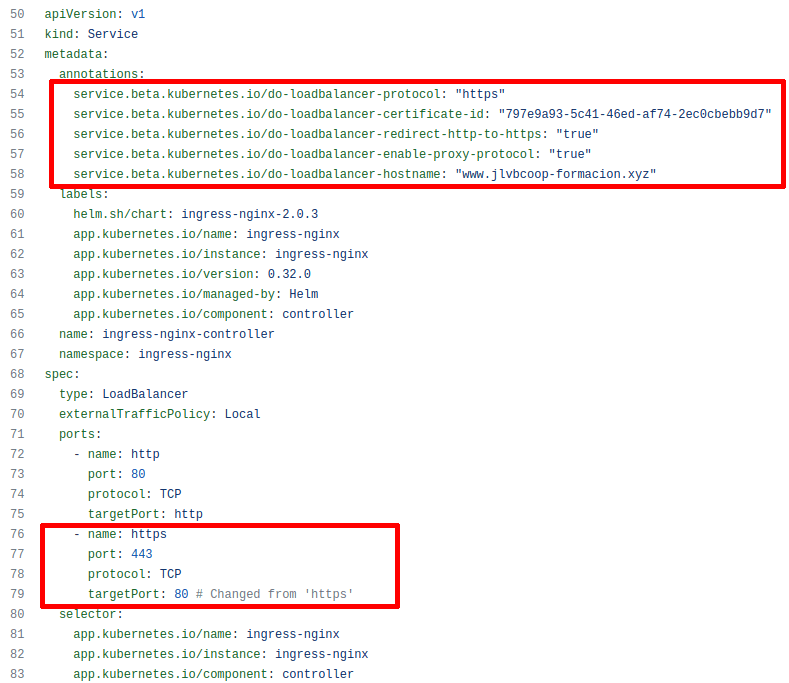
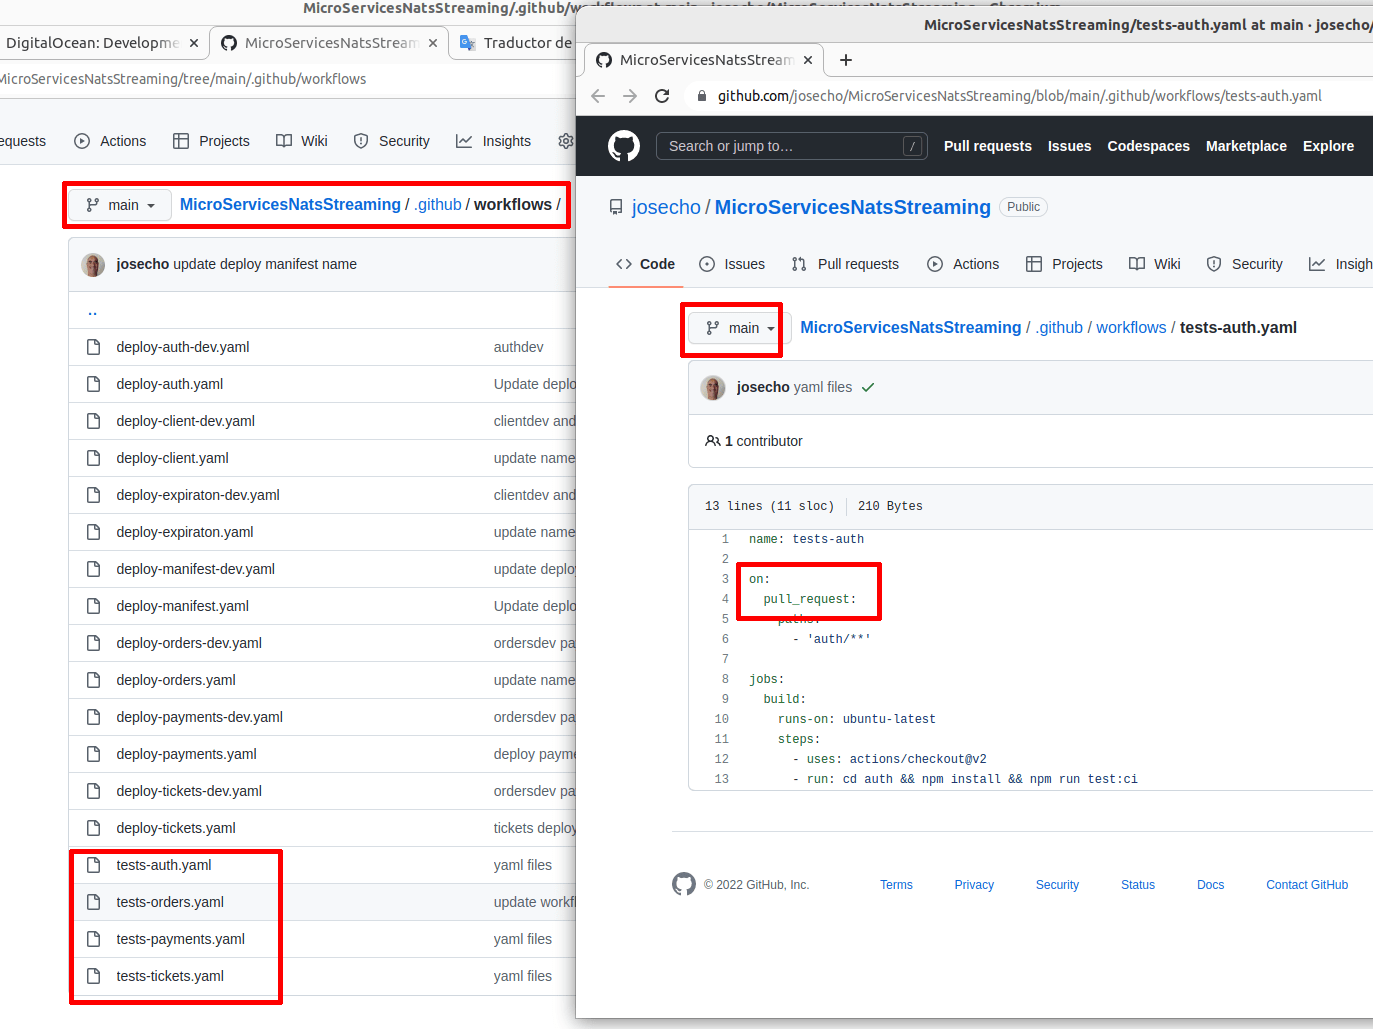
In this link, you can find documentation on how to activate an SSL certificate in DigitalOcean. On the other hand, DigitalOcean offers a free Let’s Encrypt type certificate, it is easy to activate and use. We have activated it in the production environment, for this environment we have created a cluster and the branch associated with it is the main branch.
In the file that deploys the load balancer, you can see the configuration of the certificate.
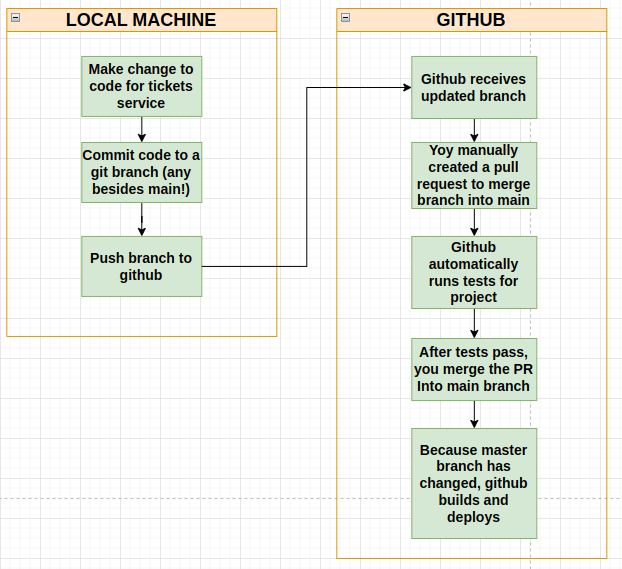
GitHub Actions makes it easy to automate all your software workflows.
We’ve added code to our own GitHub repository to make sure our tests run every time we create a new pull request to merge the code into our main branch, let’s take a look at one quick diagram.
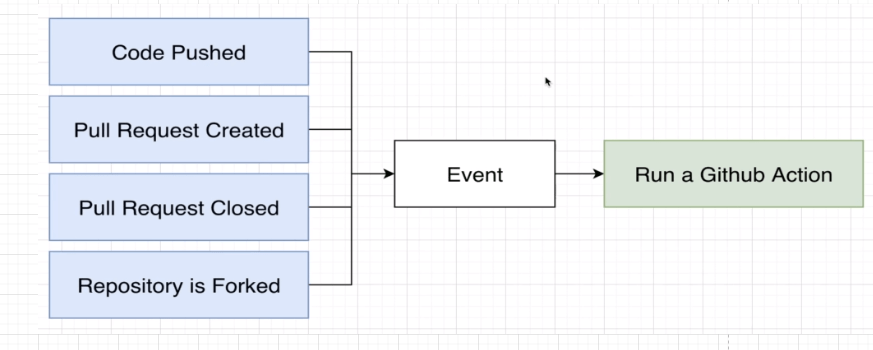
Every time a pull request is created the test must be passed correctly to allow the merging of the code into the main branch.
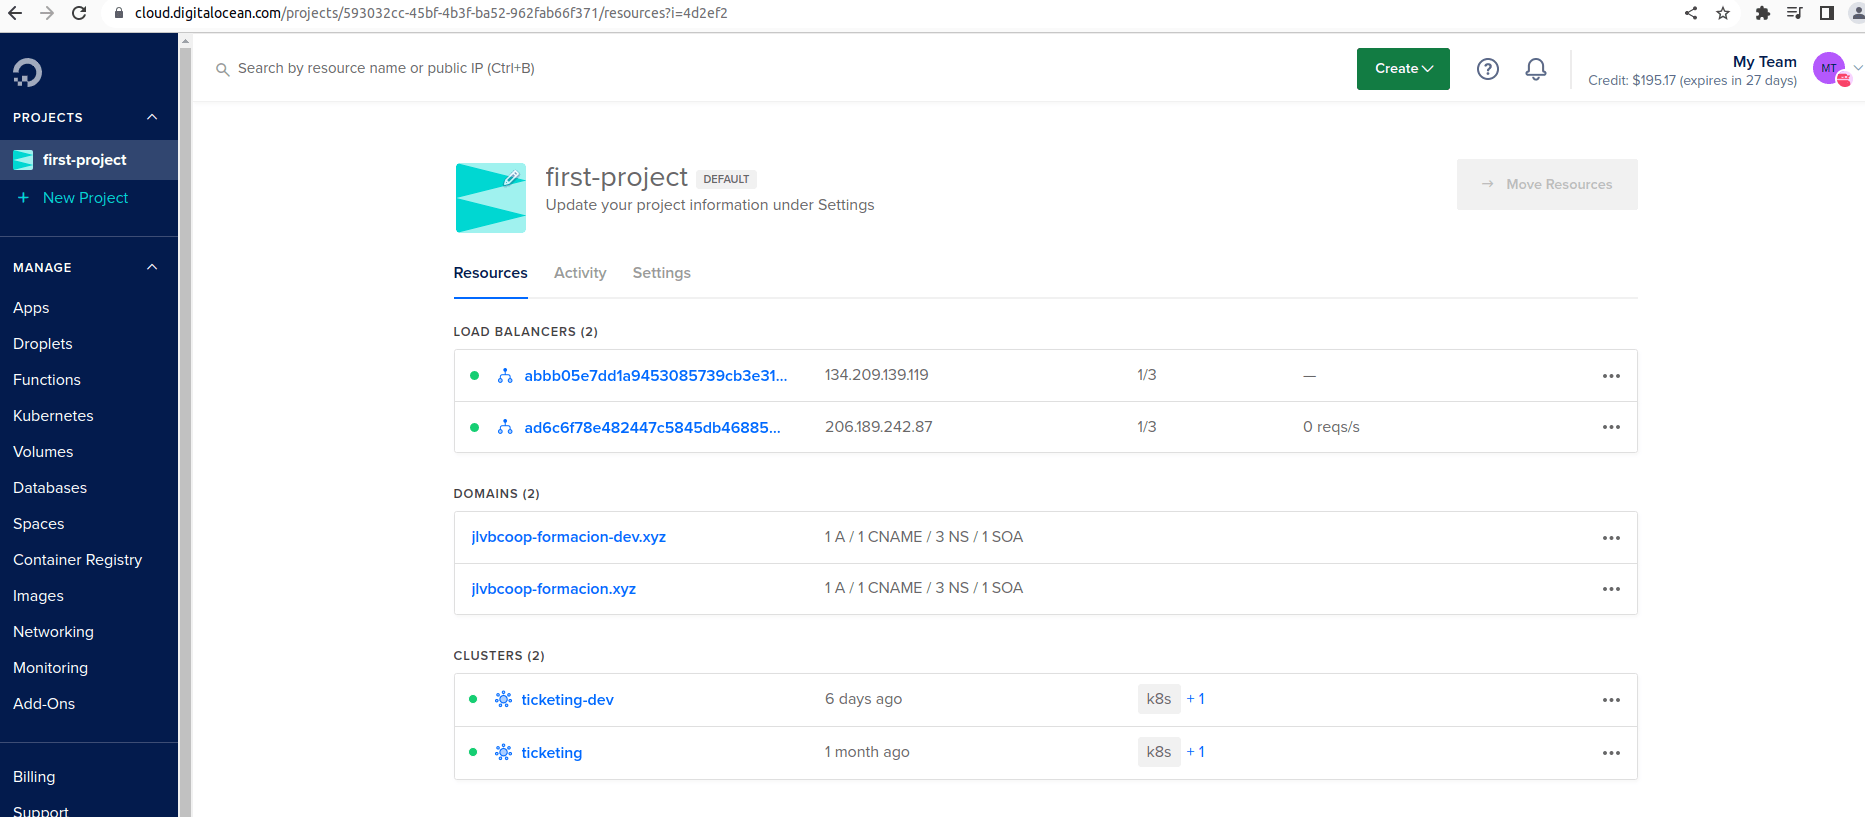
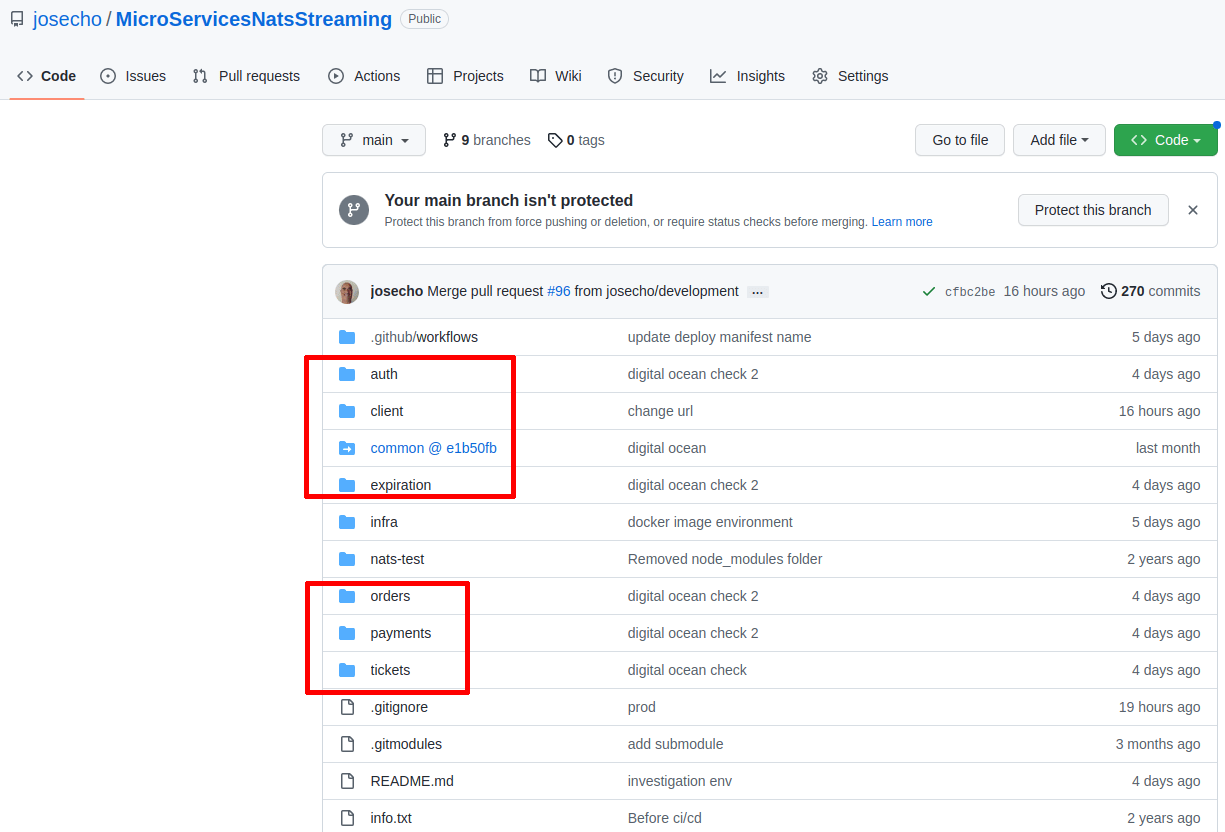
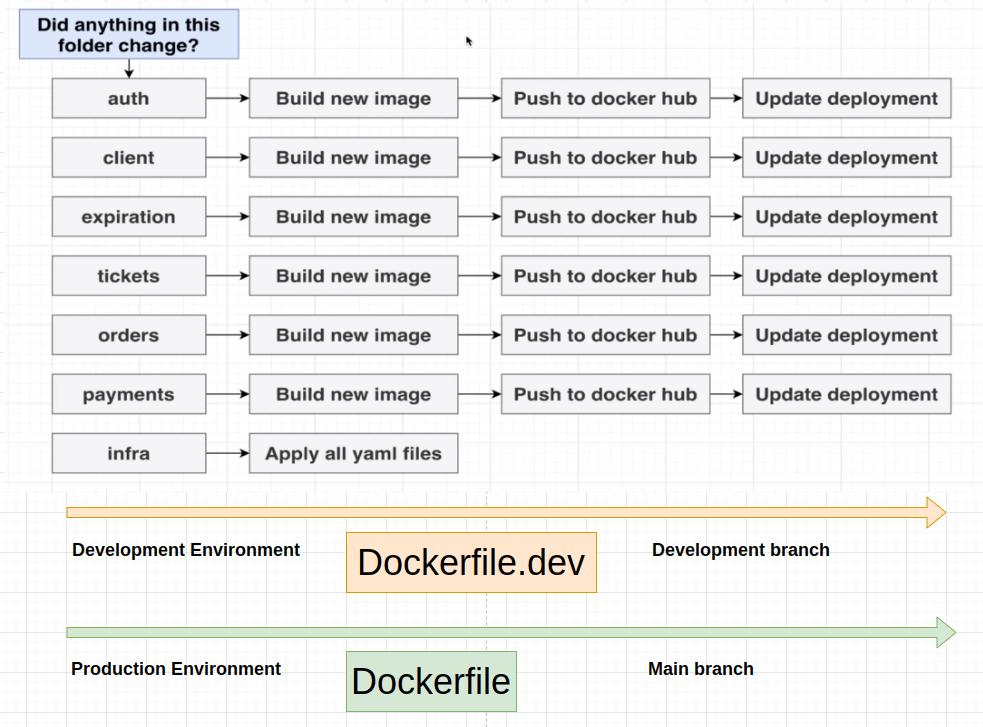
2 clusters have been created, one for the production environment and the other for the development environment. Code belonging to the production environment is in the main branch and code belonging to the development branch is in the development branch.

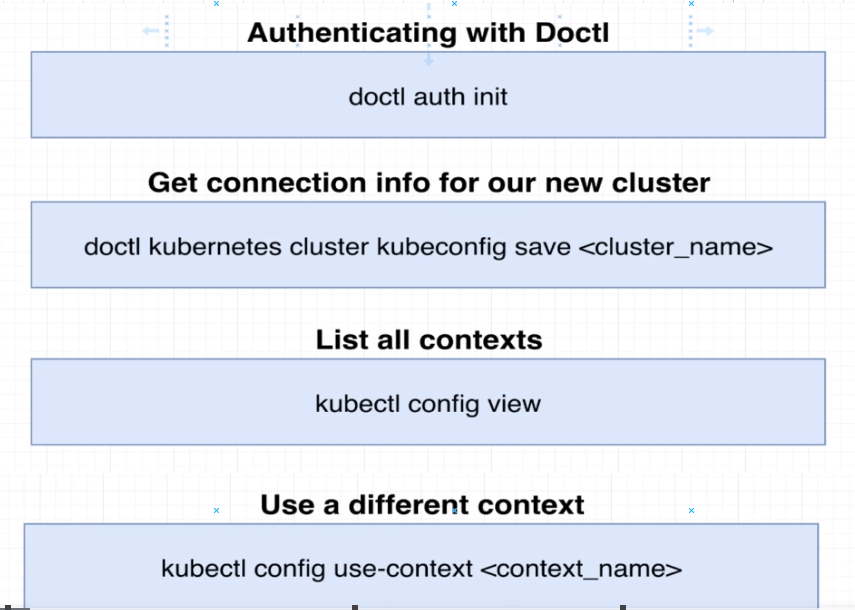
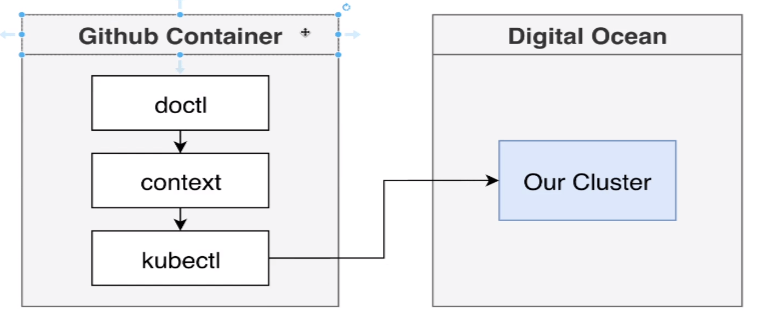
In another post, we have already talked about how to connect to the context of a Google Cloud Kubernetes cluster. In this case, it will be with a DigitalOcean K8 cluster which is very similar.
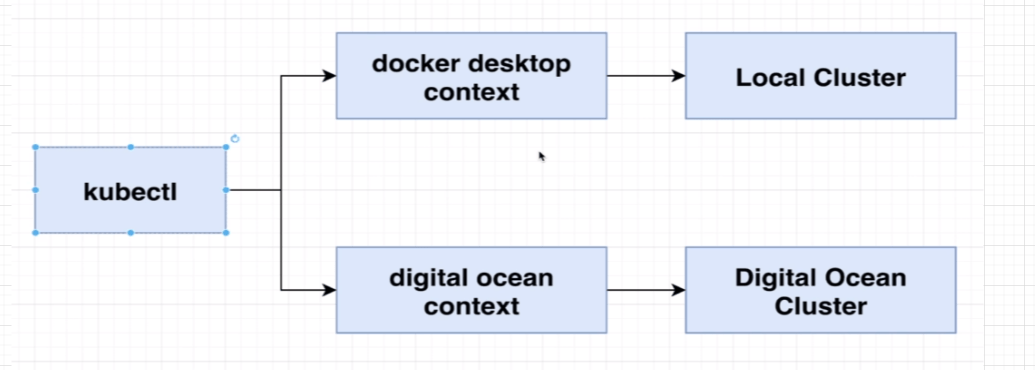
After creating the cluster, the DigitalOcean pages will give you all the instructions to install the necessary tools.
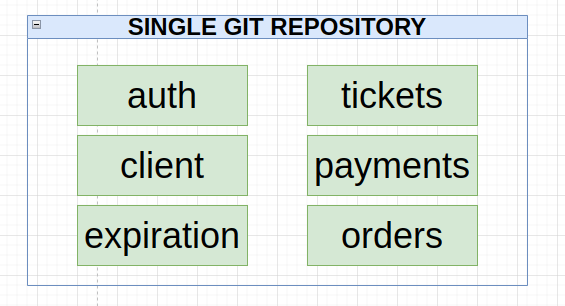
Add in an additional Dockerfile to build each service before deployment (this is the code before applying these changes, it is in another repository and deployed in Google Cloud).
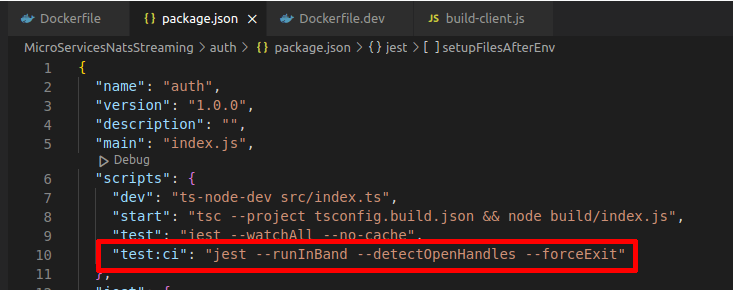
In each service, we have created an additional Dockerfile for each service. The main branch will be the branch associated with the production environment, and this Dockerfile is the one that will build the images for this environment. “Dockerfile.dev” is the one that will build the images for the development environment.
Our digital ocean clusters are up and running, we can connect to them, and now it’s time to start deploying our application to them. I’m going to show you a diagram that’s going to outline how we are going to use a GitHub action workflow to automatically deploy all of our different services to this running cluster.
All of what we have discussed in this post is a generic vision of what we have done. If you are a programmer, you will end up understanding everything better by reading the existing code. You can even create an account on DigitalOcean and try to deploy this code in your Kubernetes environment. I hope the video I created and posted at the top of the post will help you better understand everything we’ve done. If you wish, you can always ask us, and we will try to give you an answer.
Deploy a Next.js App to App Platform
Thank you so much for your attention.

 Security in business
Maybe I should have called it the STAGE environment and not the DEV environment.
Difference Between Development, Stage, And Production.
https://dev.to/flippedcoding/difference-between-development-stage-and-production-d0p